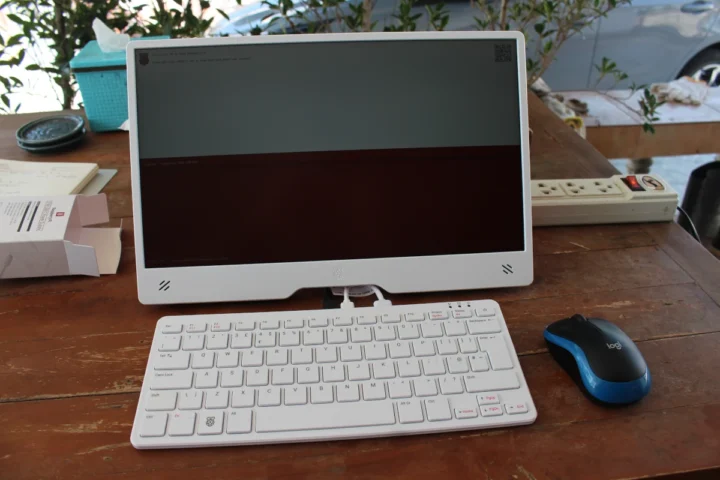
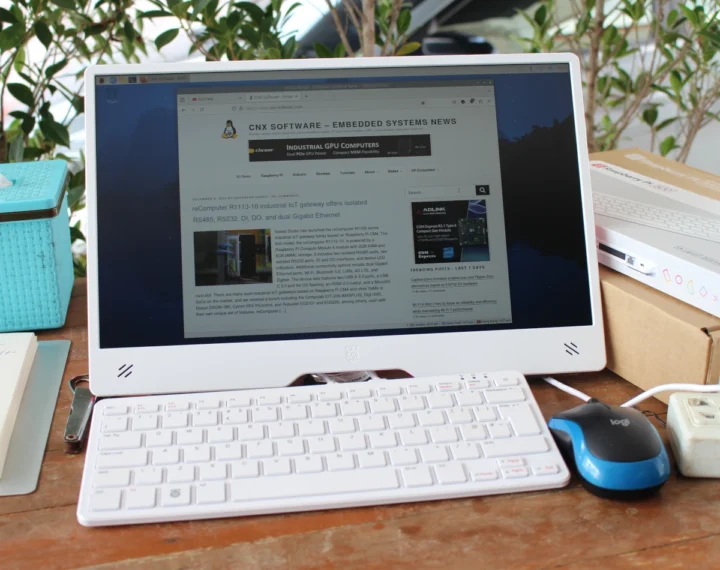
The Raspberry Pi 500 keyboard PC is just out along with the 15.6-inch Raspberry Pi Monitor and received samples from Raspberry Pi for review a few days ago. I’ve had time to play with both, so in this review, I’ll go through an unboxing of the kit I received and report my experience with both the keyboard PC and monitor.
Unboxing
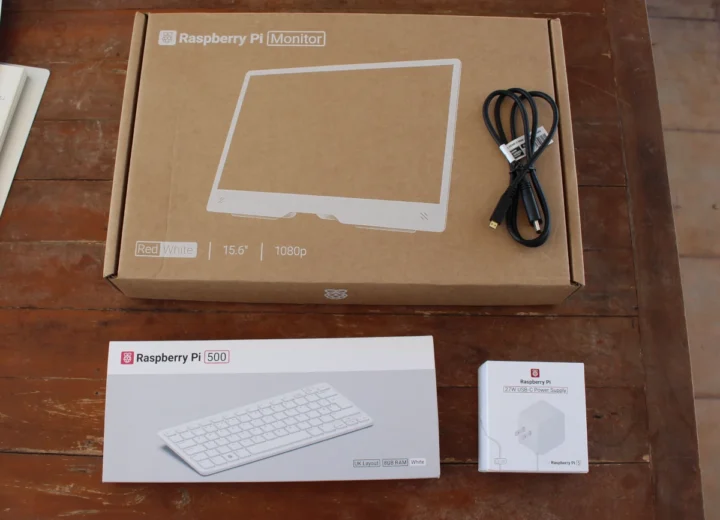
I received two packages. The first one with the Raspberry Pi Monitor, and the second with a Raspberry Pi 500 (UK layout), a 27V USB-C power adapter, and a micro HDMI to HDMI cable. So not quite a full Raspberry Pi 500 Desktop Kit since there’s no mouse and beginner’s manual but close to it.
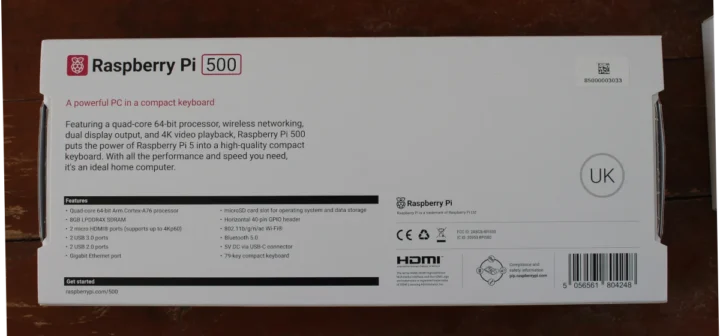
Let’s start with the keyboard PC. The bottom side of the package has some specs and a logo for the keyboard layout, in this case “UK”.
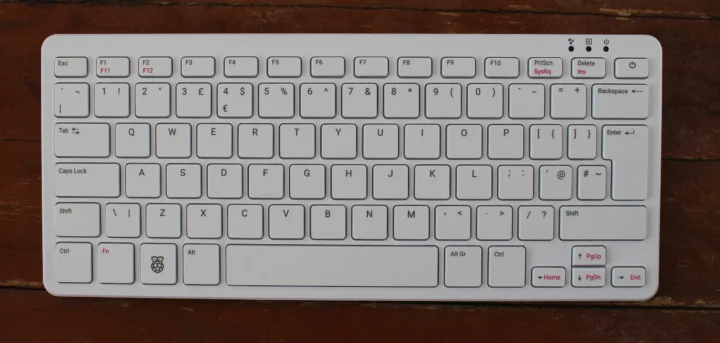
There’s only the keyboard PC in the package. Here’s the top with the 79-key UK layout. Users can already purchase a model with a US layout, and models with German, Spanish, French, Italian, Nordic, and Japanese layouts are coming. We are left out here since there’s no Raspberry Pi 500 with a Thai keyboard layout. If your language is not covered, I’d recommend the US layout for reasons I’ll explain later.
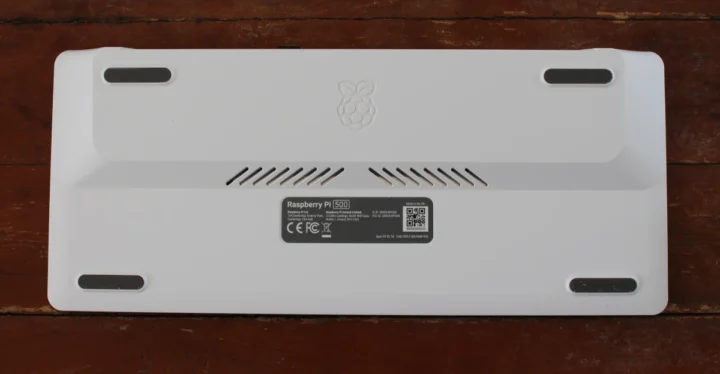
There’s nothing much to see on the bottom except some ventilation holes just like in the Raspberry Pi 400.
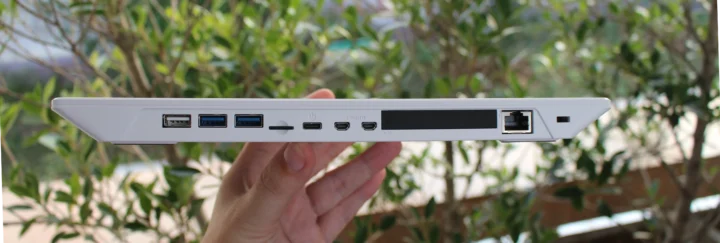
All ports can be found on the rear panel. From left to right: a USB 2.0 port, two USB 3.0 ports, a microSD card slot fitted with a 32GB microSD card, a USB-C port for power, two micro HDMI 2.0 ports, a 40-pin GPIO header, a gigabit Ethernet port and what looks like a Kensington lock slot. It has the same ports as the Raspberry Pi 400 but the ports have a much different arrangement, e.g. the 40-pin GPIO header was on the left in the Pi 400.
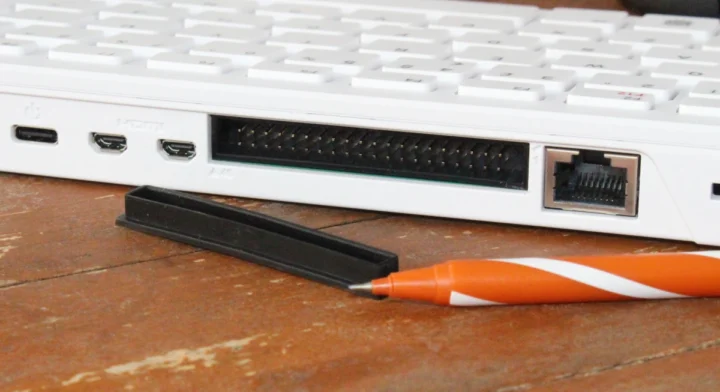
While on the subject of the 40-pin GPIO header, it’s protected by a rubber cover since most users won’t do anything with it, and to prevent dust from going in.
I tried to remove it with my fingers, but no luck, so I ended up taking the rubber cover out with a pen.
Let’s switch to the Raspberry Pi Monitor.
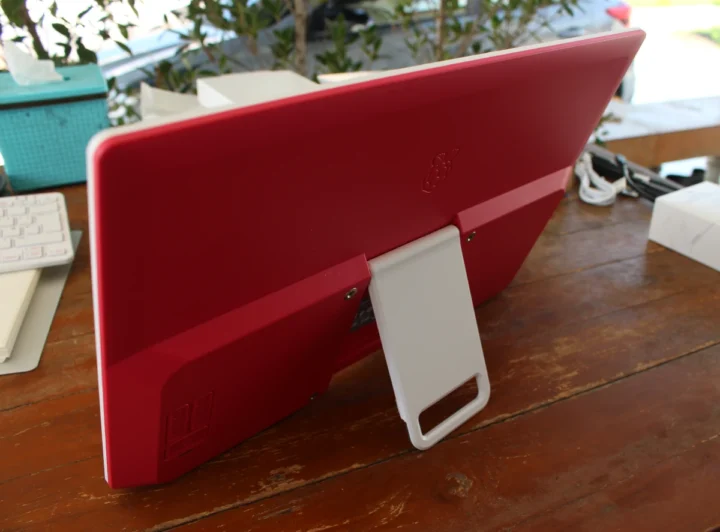
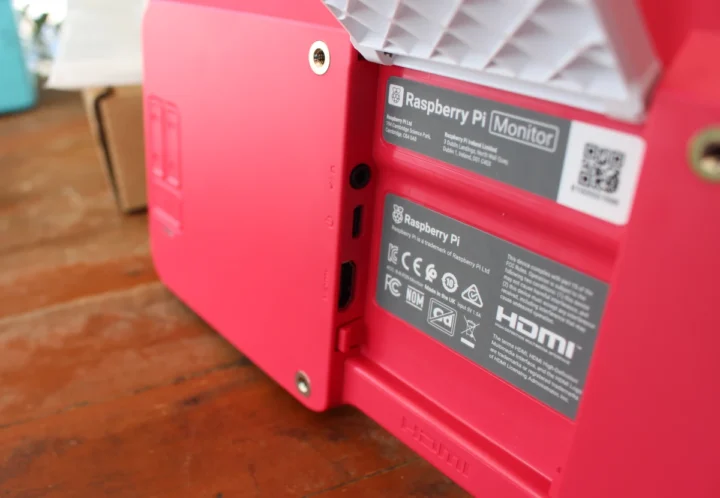
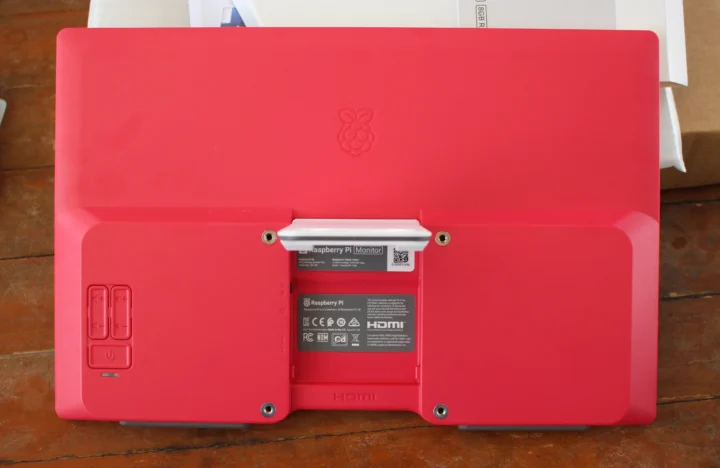
It has a stand on the back with a 180° hinge. I really like it since it’s sturdy and can be moved upright giving easy access to the HDMI, audio, and USB-C port. This also makes it easy to carry the display around thanks to its handle. In that respect, it’s much better than other portable displays I’ve used like the CrowView laptop monitor with a flimsy standard or the CrowVi USB-C and HDMI portable display with a stand made of fabric…
Three ports can be found on the back: a 3.5mm audio jack, a USB-C port for power, and a HDMI input port. I wish Raspberry Pi hardware could support USB-C video since power and display can be handled by a single cable that way. It’s neater on the desk and users can carry fewer cables in their bag, which is something I appreciate when I travel and have to move my setup every few days…
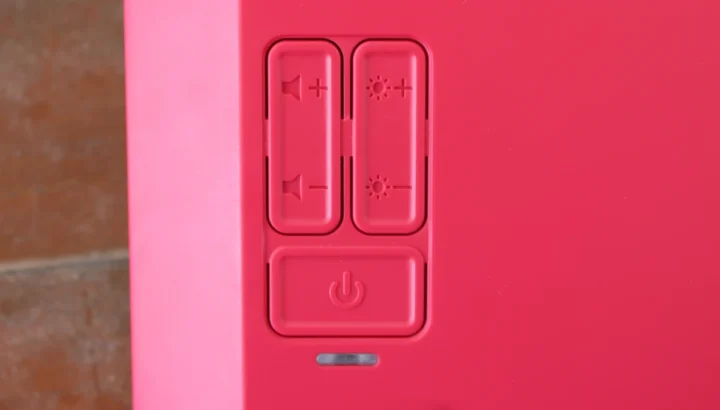
We’ll also find the brightness and volume buttons, the power button, and VESA mounting threads on the back of the monitor.
I’ve not had to use the power button during testing since the display will turn on automatically when the Raspberry Pi 500 is powered on, and it will go to sleep when the keyboard PC is turned off.
Raspberry Pi 500 first boot
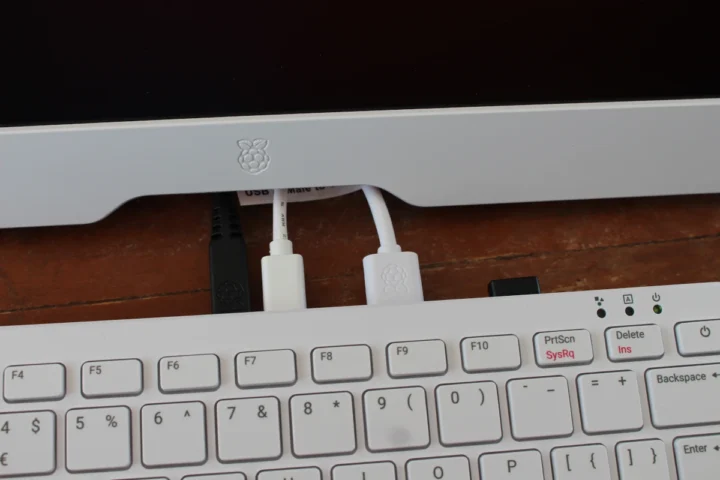
I connected the provided micro HDMI to HDMI and USB-C cables to the Raspberry Monitor for video and power, and also added an RF dongle for a mouse and the 27W USB-C power adapter to the Raspberry Pi 500 keyboard PC to get started. One more thing I appreciate about the Raspberry Pi Monitor is the curved design on the bottom that allows for cables to go under. With other portable displays, I have to either arrange the cable(s) on the sides of the display or place the monitor on top in which case it’s slightly inclined…
But the first boot did not exactly go as planned. I was expecting Raspberry Pi OS to boot immediately, but instead, the bootloader asked me whether I wanted to press SHIFT to go through a network install.
This only works with Ethernet, so I went inside, connected an Ethernet cable, and went through the installation process until I realized there was no storage and had that facepalm moment. The microSD card was there, but not fully inserted into the slot. I must have inadvertently taken it out when holding the keyboard PC.
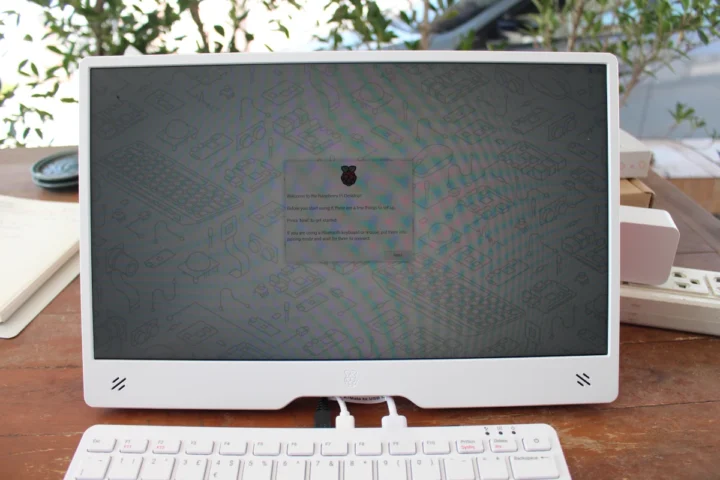
So I pushed the microSD card back into position and moved back outside to carry on with the Raspberry Pi 500 and Pi Monitor review. This time I was greeted with the Raspberry Pi OS setup wizard.
I first selected Thailand for the country since it’s where I reside and went to the next step, but it indeed selected the Thai keyboard without an obvious way to change the layout. So I went back to select “Thailand” and “use English keyboard”. It’s not ideal since I have a UK keyboard, so that’s why I recommend purchasing a Raspberry Pi 500 with a US keyboard layout if there aren’t any models with your country’s default layout.
It took a while until the system could detect wireless networks, but I could eventually connect to my 5 GHz WiFi access point and complete the installation with a working Internet connection.
Raspberry Pi Monitor Tips and Tests
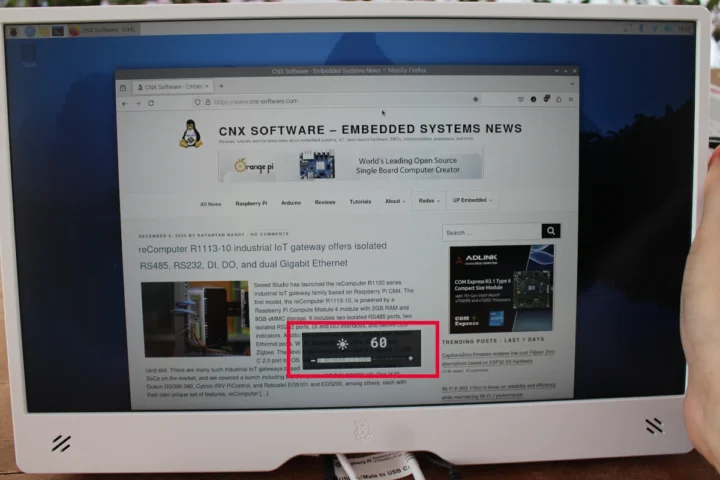
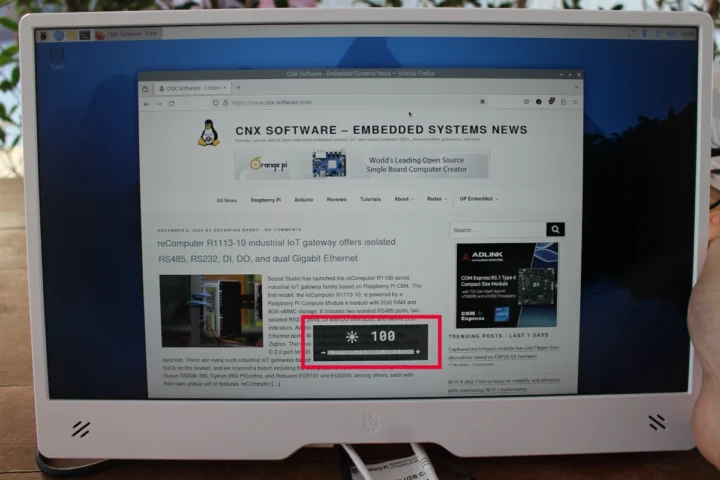
The first time I set up the hardware I did what most users do: install everything without reading the user manual. Since the monitor was installed outside, I wanted to boost the brightness to the maximum, but I could not go over 60 percent as shown below.
It’s because the monitor limits the brightness to 60% and volume to 50% when the display is powered by a USB port from Raspberry Pi hardware. Once I powered the monitor with its own USB-C power adapter, I could increase the brightness (and volume) to 100%. That’s something else that a USB-C port could fix easily in future Raspberry Pi SBCs.
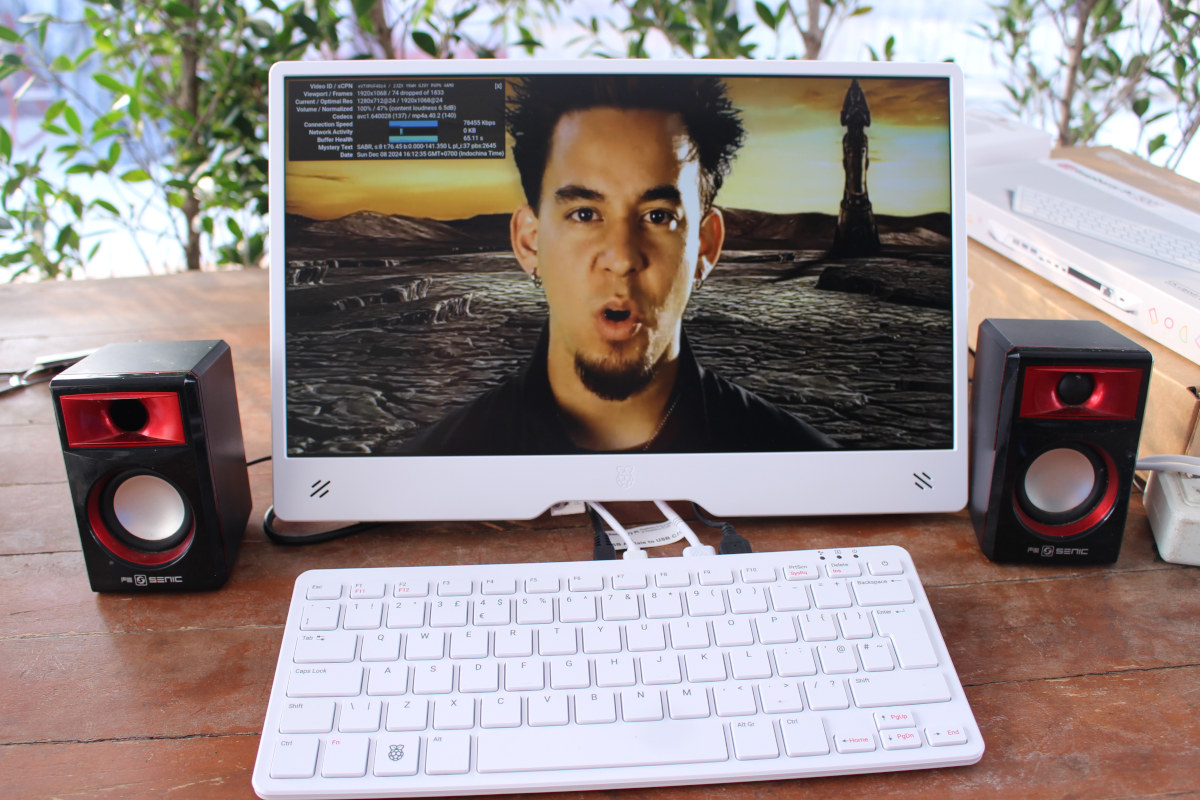
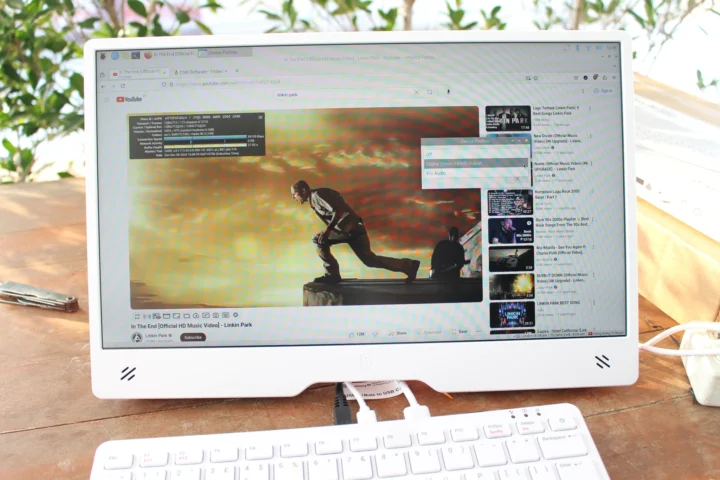
Since the Raspberry Monitor supports audio with two speakers and a 3.5mm audio jack, I played a YouTube video in Firefox getting audio from HDMI input to the built-in speakers.
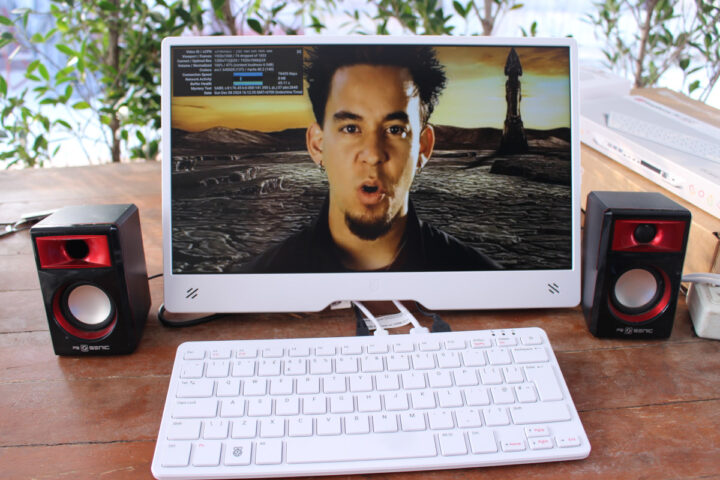
It works, but the audio quality could be improved, or using technical terms we can say the built-in speakers are garbage, and most people will not want to listen to music or watch videos with those unless there’s no other choice. So I switched to a pair of inexpensive USB-powered speakers connected to the monitor’s 3.5mm audio jack, and the audio quality was much better. The switch between HDMI and the 3.5mm audio input is automatic.
Considering some of the new Raspberry Pi products launched recently, I would not be surprised to see Raspberry Pi-branded speakers in 2025!
Raspberry Pi 500 system info, benchmarks, and cooling
Let’s now focus on Raspberry Pi 500 testing bearing in mind that in practical terms, it’s just a Raspberry Pi 5 8GB in a different form factor and lacking some interfaces like MIPI DSI and CSI or the PCIe FPC connector.
The output from inxi is basically identical to the one I got for Raspberry Pi 5, except for a different Machine Type (Raspberry Pi 500 Rev 1.) and some updates to the software since November 2023:
|
1 2 3 4 5 6 7 8 9 10 11 12 13 14 15 16 17 18 19 20 21 22 23 24 25 26 27 28 29 30 31 32 33 34 35 36 37 38 39 40 41 42 43 44 45 |
pi@raspberrypi:~ $ sudo inxi –Fc0 System: Host: raspberrypi Kernel: 6.6.62+rpt–rpi–2712 arch: aarch64 bits: 64 Console: pty pts/1 Distro: Debian GNU/Linux 12 (bookworm) Machine: Type: ARM System: Raspberry Pi 500 Rev 1.0 details: N/A rev: d04190 serial: 504d8064e8d72e87 CPU: Info: quad core model: N/A variant: cortex–a76 bits: 64 type: MCP cache: L2: 2 MiB Speed (MHz): avg: 2400 min/max: 1500/2400 cores: 1: 2400 2: 2400 3: 2400 4: 2400 Graphics: Device–1: bcm2712–hdmi0 driver: vc4_hdmi v: N/A Device–2: bcm2712–hdmi1 driver: vc4_hdmi v: N/A Display: wayland server: X.org v: 1.21.1.7 with: Xwayland v: 22.1.9 compositor: LabWC driver: gpu: vc4–drm,vc4_crtc,vc4_dpi,vc4_dsi,vc4_firmware_kms,vc4_hdmi,vc4_hvs,vc4_txp,vc4_v3d,vc4_vec tty: 80×24 resolution: 1920×1080 API: EGL/GBM Message: No known Wayland EGL/GBM data sources. Audio: Device–1: bcm2712–hdmi0 driver: vc4_hdmi Device–2: bcm2712–hdmi1 driver: vc4_hdmi API: ALSA v: k6.6.62+rpt–rpi–2712 status: kernel–api Network: Device–1: Raspberry Pi RP1 PCIe 2.0 South Bridge driver: rp1 IF: wlan0 state: up mac: 2c:cf:67:b3:d4:5e IF–ID–1: eth0 state: down mac: 2c:cf:67:b3:d4:5d Bluetooth: Device–1: bcm7271–uart driver: bcm7271_uart Report: hciconfig ID: hci0 state: up address: 2C:CF:67:B3:D4:5F bt–v: 3.0 Device–2: bcm7271–uart driver: N/A Drives: Local Storage: total: 29.54 GiB used: 5.5 GiB (18.6%) ID–1: /dev/mmcblk0 type: Removable model: USD00 size: 29.54 GiB Partition: ID–1: / size: 28.51 GiB used: 5.43 GiB (19.0%) fs: ext4 dev: /dev/mmcblk0p2 Swap: ID–1: swap–1 type: file size: 200 MiB used: 0 KiB (0.0%) file: /var/swap Sensors: System Temperatures: cpu: 58.4 C mobo: N/A Fan Speeds (RPM): N/A Info: Processes: 205 Uptime: 1h 12m Memory: 7.87 GiB used: 1.98 GiB (25.2%) gpu: 8 MiB Init: systemd target: graphical (5) Shell: Sudo inxi: 3.3.26 |
So you can expect the same performance and user experience as a Raspberry Pi 5, but I still ran sbc-bench.sh to double-check that cooling is appropriate and thermal throttle does not impact performance:
|
1 2 3 4 5 6 7 8 9 10 11 12 13 14 15 16 17 18 19 20 21 22 23 24 25 26 27 28 29 30 31 32 33 34 35 36 37 38 39 40 41 42 43 44 45 46 47 48 49 50 51 52 53 54 55 56 57 58 59 60 61 62 63 64 65 66 67 68 69 70 71 72 73 74 75 76 77 78 79 80 81 82 83 84 85 86 87 88 89 90 91 92 93 94 95 96 97 98 99 100 101 102 103 104 105 106 107 108 109 110 111 112 113 114 115 116 117 118 119 120 |
pi@raspberrypi:~ $ sudo ./sbc–bench.sh –r Starting to examine hardware/software for review purposes...
sbc–bench v0.9.68
Installing needed tools: apt–get –f –qq –y install sysstat lshw links mmc–utils smartmontools stress–ng. Something went wrong:
locale: Cannot set LC_ALL to default locale: No such file or directory
Trying to continue, tinymembench, ramlat, mhz, cpufetch, cpuminer. Done. Checking cpufreq OPP. Done. Executing tinymembench. Done. Executing RAM latency tester. Done. Executing OpenSSL benchmark. Done. Executing 7–zip benchmark. Done. Throttling test: heating up the device, 5 more minutes to wait. Done. Checking cpufreq OPP again. Done (11 minutes elapsed).
Results validation:
* Measured clockspeed not lower than advertised max CPU clockspeed * No swapping * Background activity (%system) OK * No throttling
Full results uploaded to https://0x0.st/XhKJ.txt
# Raspberry Pi 500 Rev 1.0
Tested with sbc–bench v0.9.68 on Sun, 08 Dec 2024 15:16:06 +0700. Full info: [https://0x0.st/XhKJ.txt](http://0x0.st/XhKJ.txt)
### General information:
Information courtesy of cpufetch:
SoC: Broadcom BCM2712 Technology: 16nm Microarchitecture: Cortex–A76 Max Frequency: 2.400 GHz Cores: 4 cores Features: NEON,SHA1,SHA2,AES,CRC32
BCM2712, Kernel: aarch64, Userland: arm64
CPU sysfs topology (clusters, cpufreq members, clockspeeds) cpufreq min max CPU cluster policy speed speed core type 0 0 0 1500 2400 Cortex–A76 / r4p1 1 0 0 1500 2400 Cortex–A76 / r4p1 2 0 0 1500 2400 Cortex–A76 / r4p1 3 0 0 1500 2400 Cortex–A76 / r4p1
8048 KB available RAM
### Governors/policies (performance vs. idle consumption):
Original governor settings:
cpufreq–policy0: ondemand / 2400 MHz (conservative ondemand userspace powersave performance schedutil / 1500 1600 1700 1800 1900 2000 2100 2200 2300 2400)
Tuned governor settings:
cpufreq–policy0: performance / 2400 MHz
Status of performance related policies found below /sys:
/sys/module/pcie_aspm/parameters/policy: default [performance] powersave powersupersave
### Clockspeeds (idle vs. heated up):
Before at 48.5°C:
cpu0 (Cortex–A76): OPP: 2400, ThreadX: 2400, Measured: 2399
After at 69.4°C:
cpu0 (Cortex–A76): OPP: 2400, ThreadX: 2400, Measured: 2399
### Performance baseline
* memcpy: 5513.9 MB/s, memchr: 14182.5 MB/s, memset: 12165.9 MB/s * 16M latency: 118.7 115.2 118.8 114.0 120.3 119.2 141.6 136.1 * 128M latency: 134.7 133.6 134.9 145.3 134.7 133.3 134.1 135.3 * 7–zip MIPS (3 consecutive runs): 11026, 11076, 11049 (11050 avg), single–threaded: 3194 * `aes–256–cbc 540376.57k 1003829.97k 1256061.61k 1332919.64k 1365464.41k 1367818.24k` * `aes–256–cbc 540550.66k 1003636.95k 1255956.22k 1332815.87k 1364972.89k 1368140.46k`
### PCIe and storage devices:
* Raspberry RP1 PCIe 2.0 South Bridge: Speed 5GT/s, Width x4, driver in use: rp1, * 29.5GB “Longsys USD00” UHS SDR104 SD card as /dev/mmcblk0: date 08/2024, manfid/oemid: 0x0000ad/0x4c53, hw/fw rev: 0x1/0x0
### Swap configuration:
* /var/swap on /dev/mmcblk0p2: 200.0M (0K used) on ultra slow SD card storage
### Software versions:
* Debian GNU/Linux 12 (bookworm) * Build scripts: http://archive.raspberrypi.com/debian/ bookworm main * Compiler: /usr/bin/gcc (Debian 12.2.0–14) 12.2.0 / aarch64–linux–gnu * OpenSSL 3.0.15, built on 3 Sep 2024 (Library: OpenSSL 3.0.15 3 Sep 2024) * ThreadX: 26826259 / 2024/09/23 14:02:56
### Kernel info:
* `/proc/cmdline: reboot=w coherent_pool=1M 8250.nr_uarts=1 pci=pcie_bus_safe cgroup_disable=memory numa_policy=interleave smsc95xx.macaddr=2C:CF:67:B3:D4:5D vc_mem.mem_base=0x3fc00000 vc_mem.mem_size=0x40000000 console=ttyAMA10,115200 console=tty1 root=PARTUUID=78cae15a–02 rootfstype=ext4 fsck.repair=yes rootwait quiet splash plymouth.ignore–serial–consoles cfg80211.ieee80211_regdom=TH` * Vulnerability Spec store bypass: Mitigation; Speculative Store Bypass disabled via prctl * Vulnerability Spectre v1: Mitigation; __user pointer sanitization * Vulnerability Spectre v2: Mitigation; CSV2, BHB * Kernel 6.6.62+rpt–rpi–2712 / CONFIG_HZ=250
All known settings adjusted for performance. Device now ready for benchmarking. Once finished stop with [ctrl]–[c] to get info about throttling, frequency cap and too high background activity all potentially invalidating benchmark scores. All changes with storage and PCIe devices as well as suspicious dmesg contents will be reported too.
Time fake/real load %cpu %sys %usr %nice %io %irq Temp VCore PMIC DC(V) 15:16:07: 2400/2400MHz 3.51 10% 0% 9% 0% 0% 0% 61.7°C 0.8773V 2.8W 5.13V |
The Raspberry Pi 500 delivers 11,050 MIPS on average with 7-zip and a maximum CPU temperature of 66.1°C, or 69.4°C in CPUminer, so cooling is working well, even with an ambient temperature of about 32°C. For reference, the Raspberry Pi 5 achieved 10,930 MIPS and the CPU temperature reached the same 66.1°C with an active cooler. The Raspberry Pi 500 is fanless, so a larger device greatly helps with cooling… Anyway, all this means I’d expect the Raspberry Pi 500 to work optimally even during hot summers.
Raspberry Pi 500 teardown
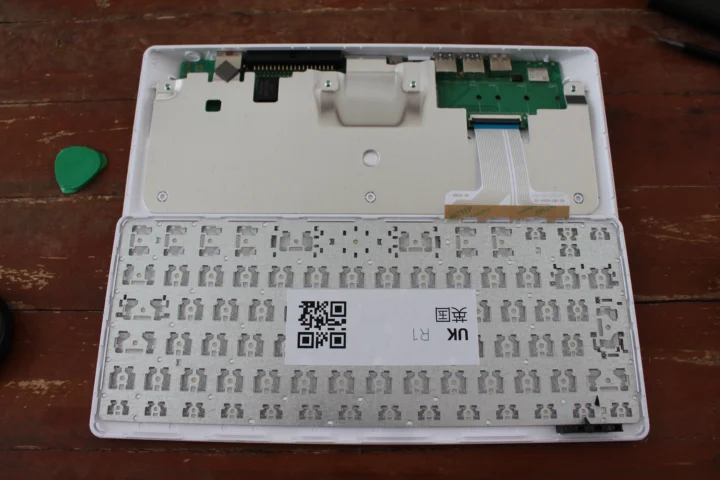
Let’s complete this year with a teardown of the Raspberry Pi 500. The mechanical design is the same as the Raspberry Pi 400 so there aren’t any screws holding the two plastic parts of the keyboard PC together. I used a small plastic tool to open the enclosure, but swiping an old credit card would also do.
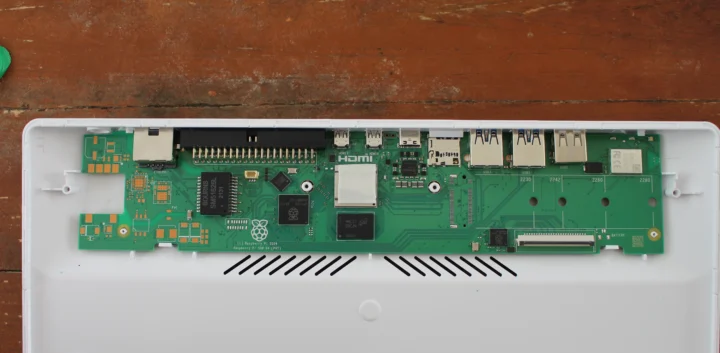
A large metal plate cools the Broadcom BCM2712 SoC with a design similar to the Pi 400. But one thing that quickly caught my attention was the ability to add an M.2 SSD to the Raspberry Pi 500. Oh, wait… The M.2 socket is not soldered… So while it’s something you could do, you’d have some soldering work to do first…
Let’s disconnect the keyboard flat cable and loosen four screws to remove the metal plate and have a better look at the Raspberry Pi 500 mainboard.
It turns out an M.2 NVMe SSD is not the only feature the Raspberry Pi 500 could potentially support, as the board was also designed with PoE circuitry (left side, unpopulated) and battery support (bottom right). So either those were just ideas that were given up, or some future Raspberry Pi 500 models may integrate an M.2 NVMe SSD, and battery or PoE support.
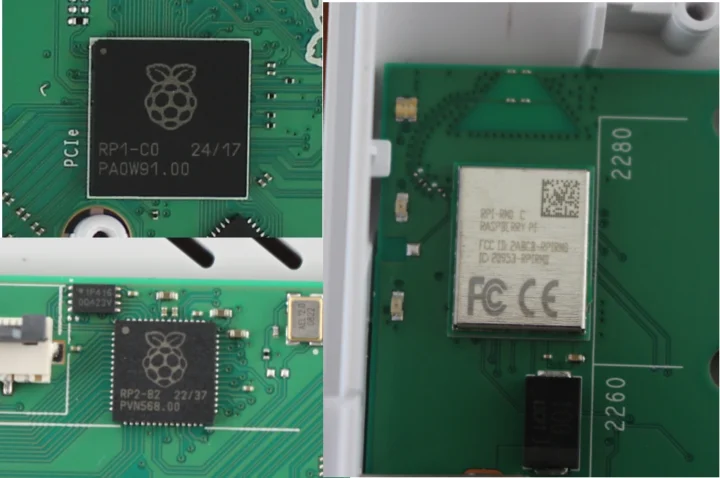
One key difference compared to the Raspberry Pi 400 is that the company has been busy making its own chips since 2020. So the Holtek HT45R0072 8-bit MCU is now replaced by a Raspberry Pi RP2040 for keyboard control, a Raspberry Pi RP1 southbridge is used instead of a VL805 PCIe to USB controller, and we’ll also find a Raspberry Pi-branded (as opposed to designed) RPI-RM0 wireless module based on Infineon CYW43455 chipset.
Other chips include Broadcom BCM54213PE gigabit Ethernet PHY, an 8GB Micro LPDDR4x chip, and a Renesas DA9091 PMIC, all of which can also be found in the Raspberry Pi 5. One change compared to Pi 5 is the use of a low-profile RJ45 connector along with a BOURNS SM51625L GbE transformer instead of an RJ45 jack with an integrated transformer.
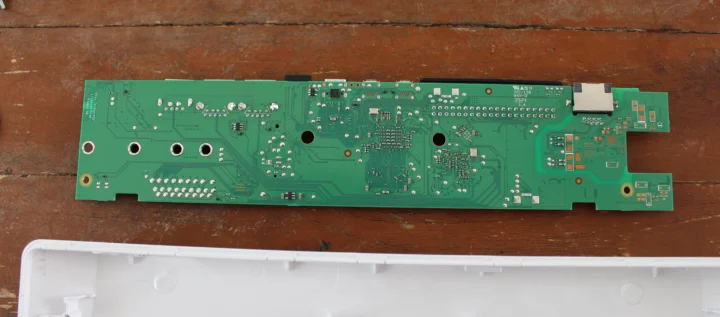
I finally took the board out of the plastic enclosure to check out the bottom side.
There’s not much to see here except plenty of small passive components.
Conclusion
The Raspberry Pi 500 is a nice upgrade to the Raspberry Pi 400 with a much faster processor (2 to 3 times) and double the memory making it more suitable as a desktop replacement. Our review showed cooling is perfectly adequate, and the Raspberry Pi 500 will work to its optimal performance even under hot conditions.
It uses the same ports as the Raspberry Pi 400, but I wish they would have slightly modified the design to allow for the insertion of an M.2 SSD for storage. For example through a cover on the bottom, but this would have increased the height of the design, and they might have thought it would not be worth it. Alternatively, they could have exposed the PCIe FPC connector allowing people to connect Raspberry Pi HAT+ with PCIe. Finally, since I’m based in Thailand, I would have wished for a Thai keyboard layout, but the small market size probably does not justify it. We can always use a US layout with keyboard stickers…
The Raspberry Pi Monitor is a first good try. I like the handle since it’s much sturdier and convenient to use than other portable display solutions I’ve played with, as well as the bottom opening for cable management. The screen itself is acceptable, but the audio quality from the speakers is rather poor and should probably be improved. I wish the display also had a USB-C input port that supports both video input and power.
I’d like to thank Raspberry Pi for sending the Pi 500 keyboard PC and 15.6-inch Monitor for review. The Raspberry Pi 500 sells for $90 US, and a $120 Raspberry Pi 500 Desktop Kit is also available for a power supply, a mouse, a micro HDMI to HDMI cable, and a beginner’s guide in English. The Raspberry Pi Monitor goes for $100 with a USB-C cable for power and a user manual.


Jean-Luc started CNX Software in 2010 as a part-time endeavor, before quitting his job as a software engineering manager, and starting to write daily news, and reviews full time later in 2011.
Support CNX Software! Donate via cryptocurrencies, become a Patron on Patreon, or purchase goods on Amazon or Aliexpress

